Choose the right liquid staking protocol
The easiest mistake with Liquid Staking is comparing options on the most visible detail while ignoring the day-to-day constraint. A choice can look strong on paper and still fail because it is too hard to maintain, too expensive to repeat, or awkward in the actual setting. Use the same checklist for every option: fit, cost, durability, timing, upkeep, and fallback plan. That keeps the comparison practical instead of drifting into preference alone.
| Factor | What to check | Why it matters |
|---|---|---|
| Fit | Match the option to the primary use case. | A good deal still fails if it does not fit the job. |
| Condition | Verify age, wear, and service history. | Hidden condition issues erase upfront savings. |
| Cost | Compare purchase price with likely upkeep. | The cheapest option is not always the lowest-cost option. |
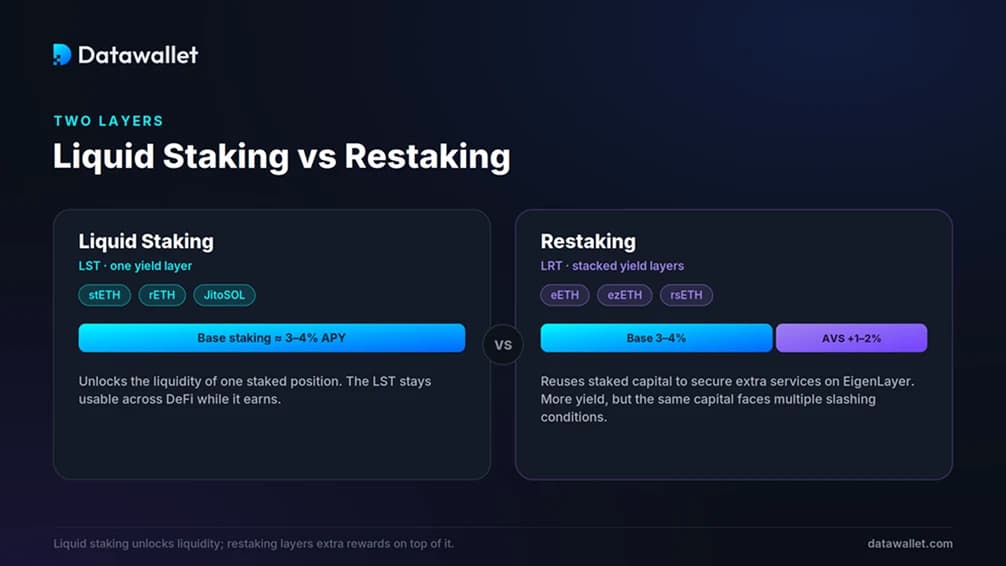
Deposit assets and receive stETH or rETH
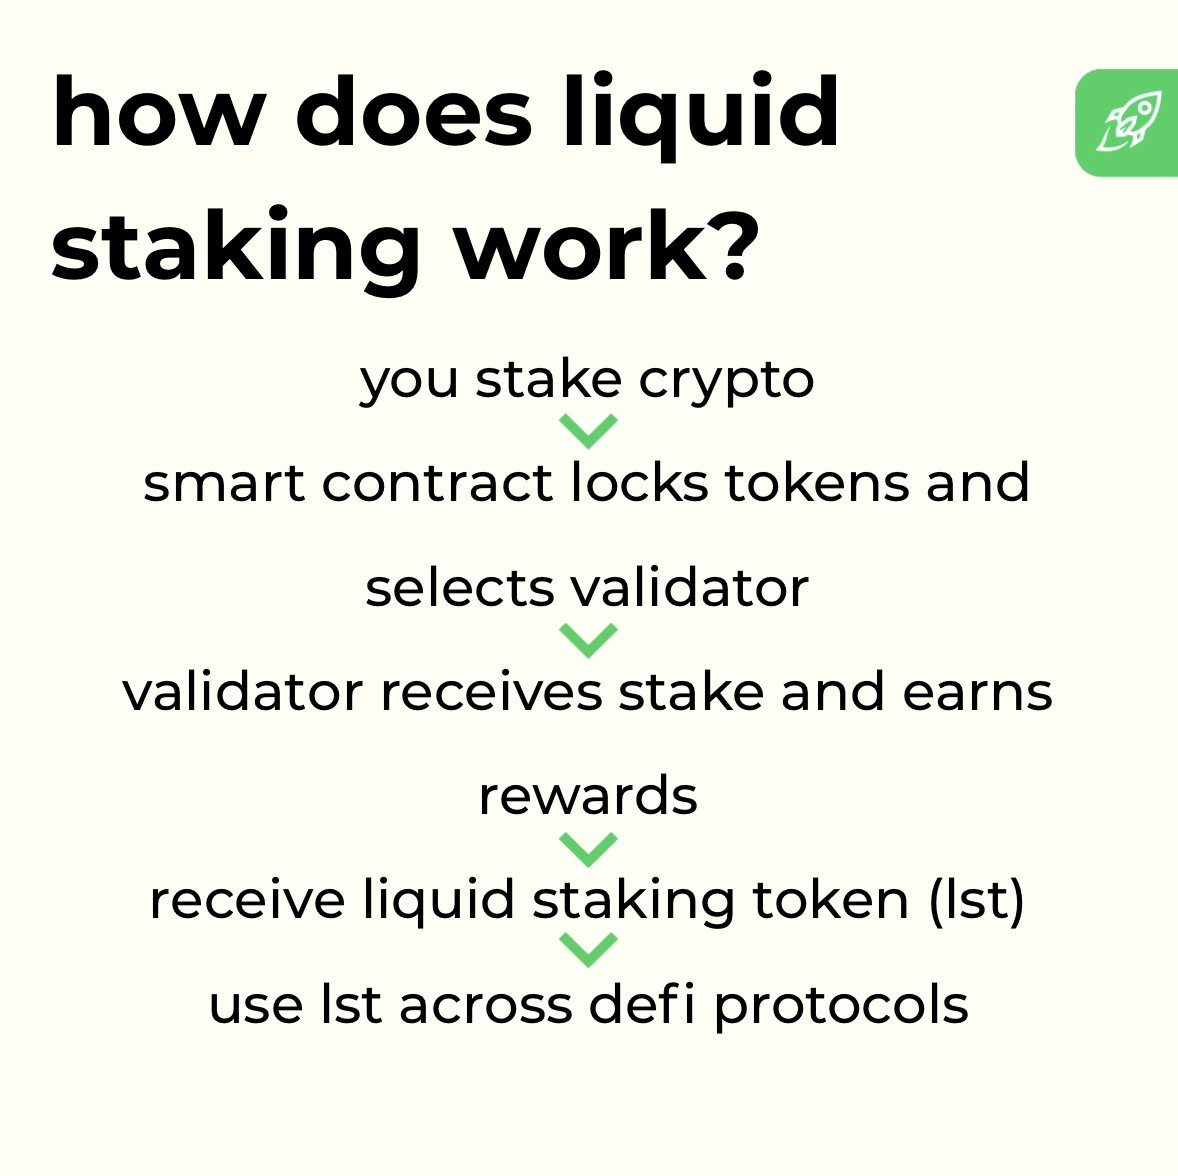
Liquid staking 2026 relies on a straightforward mechanism: you lock your native crypto, and the protocol issues a receipt token representing your stake. This allows you to earn yield while retaining the ability to trade or use the token in other DeFi applications. The process varies slightly depending on whether you are using a centralized exchange or a decentralized protocol.
Start by accessing your preferred staking platform. For decentralized options like Lido or Rocket Pool, connect your Web3 wallet (such as MetaMask or Rabby) to the protocol’s official website. If you are using a centralized exchange like Coinbase or Kraken, navigate to the staking dashboard and ensure your account is verified.
Choose the cryptocurrency you wish to stake, typically ETH, SOL, or BNB. Enter the amount you want to deposit. Be mindful of the minimum deposit requirements and any network fees (gas) required to process the transaction. Most platforms allow you to stake any fraction of the asset, so you can start small if needed.
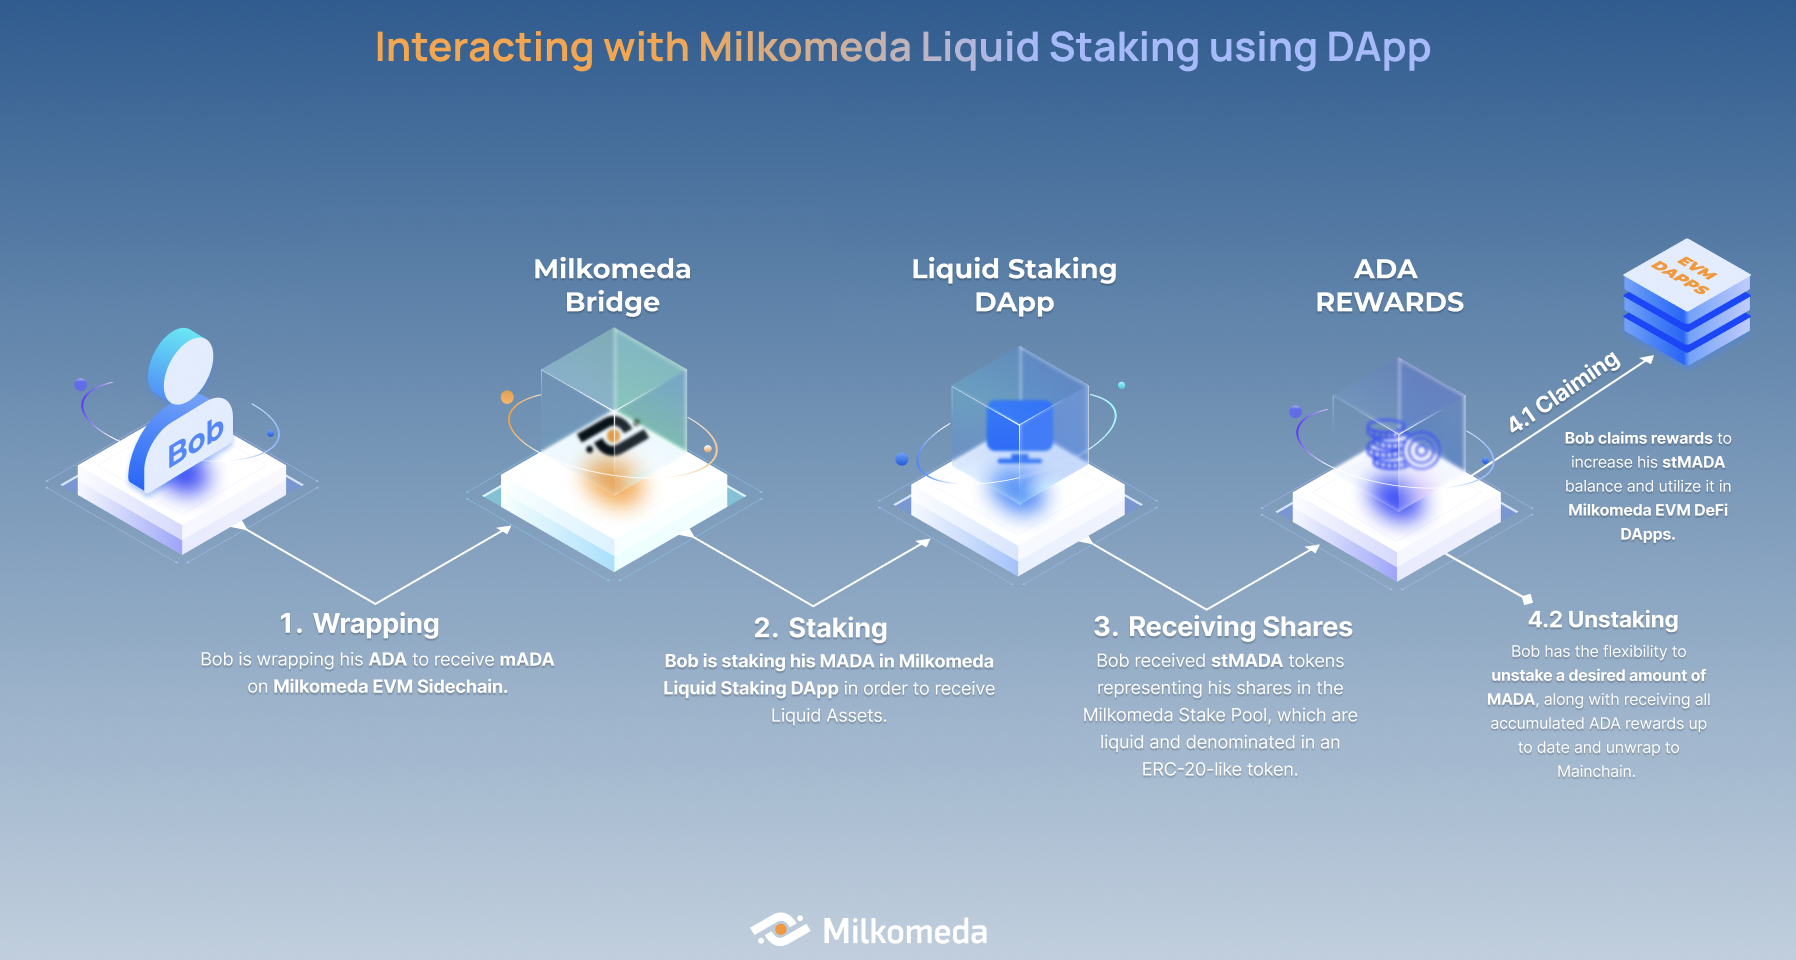
Review the staking terms, including the estimated annual percentage yield (APY) and any lock-up periods. Confirm the transaction in your wallet or click the deposit button on the exchange. For decentralized protocols, you will need to approve the smart contract to access your tokens before the final deposit transaction is sent to the blockchain.
Once the transaction is confirmed on-chain, the protocol will mint and send the corresponding liquid staking token (LST) to your wallet. For example, depositing ETH into Lido results in stETH, while depositing into Rocket Pool yields rETH. These tokens will appear in your wallet balance and can be transferred or used immediately.
The receipt token you receive (such as stETH or rETH) is pegged to the value of your original deposit plus accrued staking rewards. Unlike native staking, where your funds are locked and illiquid, these tokens can be traded on decentralized exchanges or supplied to lending protocols to generate additional yield. This dual-layer yield potential is the primary advantage of liquid staking in the current market.
Deploy LSTs into DeFi yield strategies
Liquid Staking works best as a clear sequence: define the constraint, compare the realistic options, test the tradeoff, and choose the path with the fewest hidden costs. That order keeps the advice usable instead of decorative. After each step, pause long enough to check whether the recommendation still fits the reader's actual situation. If it depends on perfect timing, unusual access, or a best-case budget, include a simpler fallback.


Monitor smart contract and slashing risks
Liquid Staking works best as a clear sequence: define the constraint, compare the realistic options, test the tradeoff, and choose the path with the fewest hidden costs. That order keeps the advice usable instead of decorative. After each step, pause long enough to check whether the recommendation still fits the reader's actual situation. If it depends on perfect timing, unusual access, or a best-case budget, include a simpler fallback.
The simplest way to use this section is to write down the real constraint first, compare each option against it, and choose the path that still works outside ideal conditions.
Exit positions and claim underlying assets
Withdrawing your staked assets reverses the initial deposit, converting liquid staking tokens (LSTs) back into the native blockchain asset. This process is not instantaneous. You must account for network-specific unbonding periods and potential slippage when moving between the liquid market and the native chain.
Before initiating a withdrawal, verify the protocol’s unbonding period. On Ethereum, this typically takes 7-14 days. On Solana or Cosmos, it may be shorter or immediate depending on the validator. This delay is a security feature, not a bug, designed to protect the network from malicious validator behavior. Plan your liquidity needs around this timeline.
You have two primary paths: direct withdrawal or secondary market sale. Direct withdrawal sends assets back to your wallet as native tokens after the unbonding period. Selling on a DEX or centralized exchange is faster but exposes you to market price fluctuations and trading fees. Use the secondary market if you need immediate liquidity and can tolerate the spread.
Connect your wallet to the official staking dashboard. Select the "Unstake" or "Withdraw" option. Ensure you have enough native gas tokens (ETH, SOL, etc.) to cover the transaction fees. Review the estimated time to completion and confirm the transaction. For high-value exits, consider splitting the transaction into smaller batches to manage risk.
After submitting the transaction, monitor its status on the blockchain explorer. Once the unbonding period ends, the native assets will be credited to your wallet. If you sold LSTs on a secondary market, the fiat or stablecoin proceeds will appear in your exchange or DEX balance immediately. Always verify the final balance in your wallet before closing the position.
-
Verify unbonding period for your specific chain
-
Check gas fees for withdrawal transaction
-
Confirm wallet balance after unbonding completes
-
Review tax implications of unstaking rewards
No comments yet. Be the first to share your thoughts!